This enhancement allows authorized users to create and manage areas of responsibility (AORs), which are similar to neighborhoods, for specific areas. LInX/D-DEx users will then be able to create a report of criminal activity occurring in an AOR during a specified time interval. Users will be able to search a pre-defined AOR by Incident Type, Crime Type, Occupation, and Date Range.
The AOR Report functionality is configurable by site, and may not be available on all LInX sites. The AOR Report is not available in Night Mode.
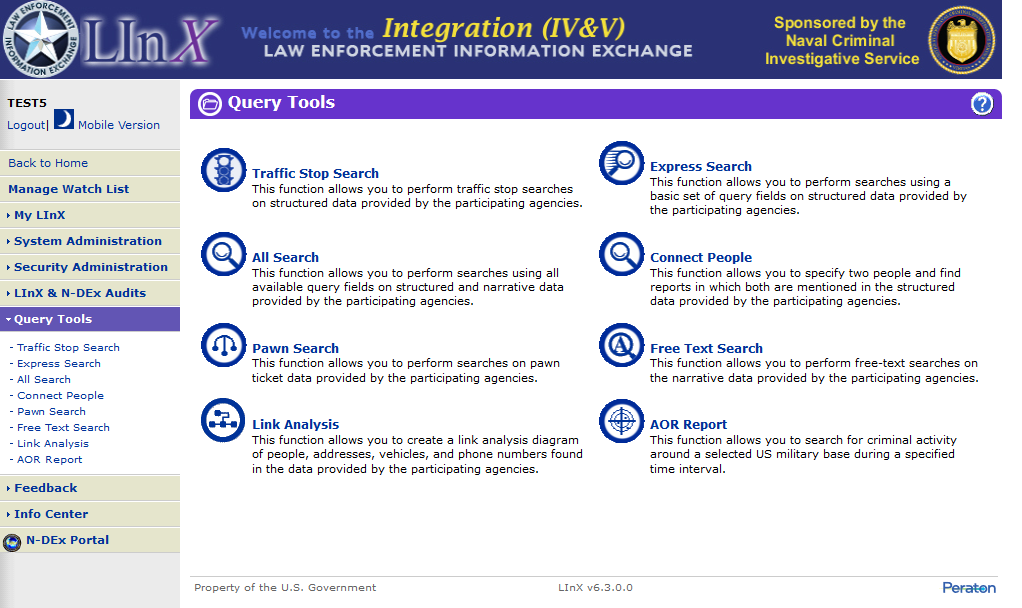
Tactical and Analytical LInX users can access the AOR Report either from the Query Tools title page, or from the menu bar located along the left side of the screen.
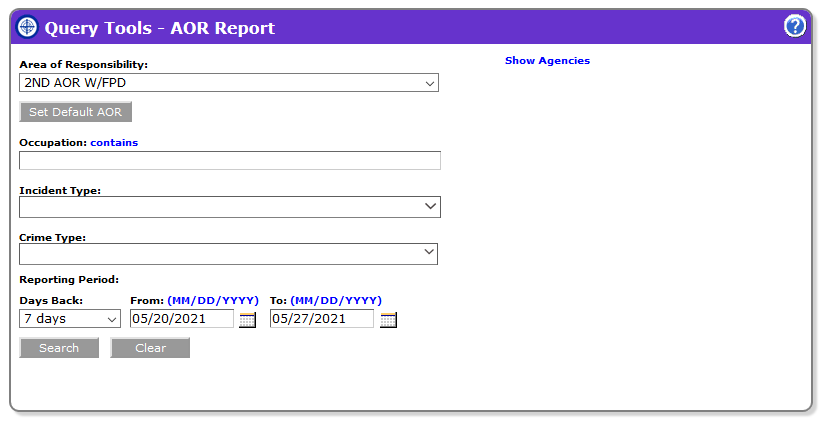
The AOR Report page allows users to enter search criteria that can be used to generate a report for the specified area of responsibility.
The following search criteria can be used to generate an AOR Report:
Ø Area of Responsibility [drop-down list]
Ø Show Agencies link [info only; toggle to open/close]
Ø Occupation
Ø Incident Type [pop-up list]
Ø Crime Type [pop-up list]
Ø Reporting Period [Last 7, 14, 30, or 90 days or Date Range]
AORs are created by authorized users and made available to other users on the system.
The Area of Responsibility (AOR) field is pre-populated with the default AOR that was set in the user's My LInX/Set Preferences. If no selection was made in Set Preferences, the AOR is pre-populated with the agency default. Click the down arrow at the end of the Area of Responsibility field to display a list of available AORs to search. Click on the desired AOR from the drop-down menu to close the menu and populate the Area of Responsibility field with the selected AOR.
Clicking on the Show Agencies link will display the list of agencies that is contained in the selected AOR. The agencies contained in the AOR can be modified only by authorized users.
The Occupation field may be used to further focus the search. Occupation searches utilize a hierarchical thesaurus when searching military occupation entries.
Hierarchical Thesaurus for Military Occupation Searches
The thesaurus feature for the Occupation search field has been enhanced to make it easier to match on military occupation entries in agency data. There are two levels of military occupation synonyms:
Ø A high level for general military occupations that match any general military occupation and all specific branches of the armed services
Ø A lower level for matching within specific branches of the military only.
Examples are shown below.
A search of DoD or Military will match on: MP, reservist, active duty, reserves, enlisted, Navy, Army, Air Force, Marine Corps, US Navy, USN, U S N, USNR, USS, sailor, seaman, US Army, USAR, USA, soldier, US Air Force, USAF, U S A F, USAFR, airman, US Marine Corps, Marines, Marine, USM, U S M C, and USMCR.
A search of Navy will match on: Navy, US Navy, USN, U S N, USNR, USS, sailor, and seaman (it will not match on DoD, military, or thesaurus entries for the other services).
A search of sailor will match on: Navy, US Navy, USN, U S N, USNR, USS, sailor and seaman.
Occupation searches always use the thesaurus.
Multiple Incident Types can be selected by clicking the down-arrow at the end of the Incident Type field to open the pop-up menu. After checking all desired Incident Types to search, click OK to save the selections and close the pop-up menu. Clicking Clear in the pop-up menu will deselect any previous selections. When the pop-up menu closes, the Incident Type field will be populated with a list of selected Incident Types to be searched.
The default setting for this field is All Incident Types. Therefore, if no Incident Types are selected, all Incident Types will be searched.
Crime Type selection is similar to that of Incident Type. If no Crime Type is selected, all Crime Types will be searched.
When AOR Report is first selected, the Reporting Period is defaulted to the last 7 days from the current system date. The drop-down arrow at the end of the Last 7 days selection provides the user with the ability to set the period to the last 14, 30, or 90 days.
Alternatively, a date range may be used by selecting the date range radio button. Selecting this option will automatically pre-populate the date range fields, extending back 30 days from the current system date. The date range can be manually modified to any desired period of time.

When all the information to be used in the query has been entered, and the source of information selected, clicking on the Search button will begin the search process.

The Clear button, located at the bottom of the search screen, will clear all the fields in the query screen, with the exception of the AOR field. The Incident Type, Crime Type, and Reporting Period values will be reset to their default settings.
Search results will be provided in a report format that is event-centric; rather than person-centric, as the LInX structured results are. The report will contain Incident Date and Time, Incident Type (Arrest, Citation, etc.), Crime Type (Assault, Burglary, etc.), Incident Summary, Incident Location, Agency Name, and Incident Number.
Selecting an entry in the report will display the Event Report for that event. Depending on system configuration parameters and rules of use for the systems/agencies with data in the result set, users may be able to view the results on a Map, save the results to KML or PDF (Print).
If the associated Event Report has not been accessed, the folder icon is highlighted in green [ ]. If the
associated Event Report has been accessed, the folder is not highlighted [
]. If the
associated Event Report has been accessed, the folder is not highlighted [![]() ].
].
Note 1: An Event Report will continue to display as having been accessed for as long as it remains in the browser history.
Note 2: Color-blindness shading of the Report View icon will appear different between Event Reports that have been accessed and those that have not.
.jpg)
Advanced Analytics users may also be able to export the results to a CSV file (MS Excel spreadsheet) or flat file (Notepad).
Tactical and Analytical users should contact their System Administrator or Agency Administrator when they are having problems accessing or using LInX. Only System Administrators are authorized to contact the LInX Help Desk.